VoxReducer Kit Operation
- Start the voxReducer Kit II application
- To add songs to your playlist:
⁃ Click the “Show Playlist” arrow to display the playlist panel.
⁃ Click the “Add” button at the bottom of the playlist panel to add songs, or drag and drop
from your Music folder, to the playlist - Highlight the song you want to play in the playlist, and press the play button.
- Factory and Custom Presets:
⁃ Select a factory preset for your stereo music file, our use the default preset.
⁃ Add custom presets by selecting “Add New Preset” from the presets menu, entering a name in the popup window, and clicking “Save” - If the audio signal is distorted, simply adjust the source channel volume.
- Adjust the playlist order by highlighting a song, and using the up and down buttons to move the selected song.
- Remove a song by highlighting a song, and clicking the “Clear” button or using the delete key
- Adjust volume with the “master volume” slider.
- Save the playlist by clicking the “Save” button, or File->Save.
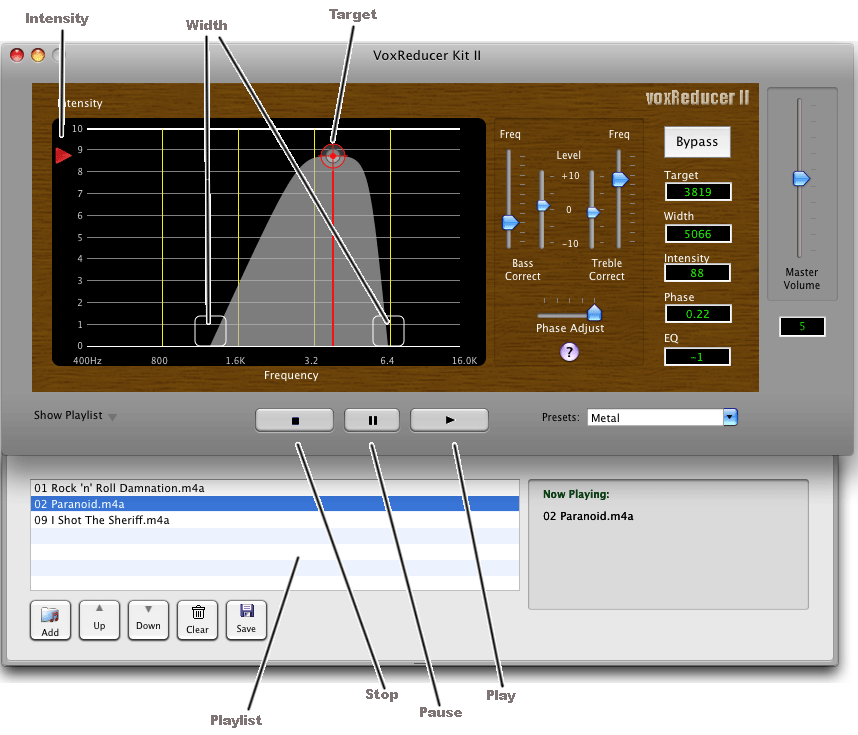
Using VoxReducer Kit II
- It is best to start with a factory preset as a guide, and adjust your vocal reduction settings slowly.
- Target – Adjusting the “Target” sets the target frequency of the music track to be processed. For singers with lower voices the setting will be lower end frequencies, for singers with higher voices the setting will be higher higher frequencies. – Using your mouse pointer, click anywhere in the graphic view window, or drag the red crosshair handle in the graphic view window to set the target frequency for the current vocal track. Move the Target handle horizontally to set frequency. You can also set the vocal reduction intensity by moving the target vertically.
- Width – Adjusting the “Width” expands or contracts the size of the processed portion of the audio spectrum around the target. So, if the vocalist has a short range, then set the Width to a lower value, if the singer has a wide range, set the Width higher. The factory settings are a good guide, however, you can adjust the vocal reduction width by clicking and dragging the width handles horizontally. The width handles are located at the bottom of the graphic view, and have a white outline. Be sure to adjust these slowly, due to mouse tracking.
- Intensity – Intensity is the level of vocal reduction. (To avoid audio artifacts in processing, please try not to add more vocal reduction than needed.) – Adjust the vocal reduction intensity by moving the target vertically. You may also adjust the intensity arrow, on the left site of the graphic view, vertically to set the intensity.
- Phase Adjust – Phase adjust will offset the center channel phase, in order to reduce audio artifacts generated by the vocal reducer processing. An appropriate level is set by the factory presets; however, feel free to adjust as necessary.
- Bass and Treble Correction – Adjust Bass and Treble frequency with sliders, and cut or boost.
Note: Other center channel elements(i.e. kick drum and snare) may be reduced along with the vocal track when intensity is increased. Find your desired balance. Excessive intensity levels will produce audio artifacts (such as a “ringing” sound)