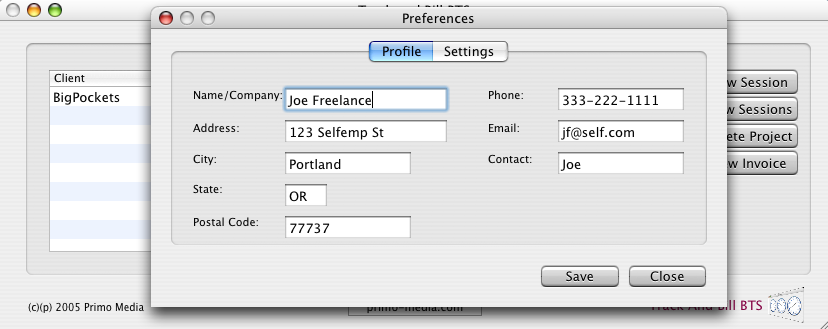
Preferences:
BTS Track and Bill allows the user to store profile info in order to automate the invoicing process. Please open the “Preferences” panel(from Track and Bill BTS dropdown select), to view the profile form.
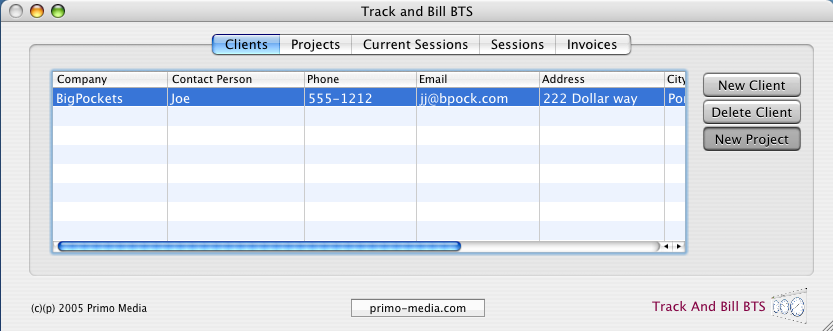
Clients:
Before starting a project, you must add clients to your client list. Click on the “Clients” tab and select the “New Client” button to create a new Client. Enter the client information in the display list by clicking on each cell. BTS Track and Bill will save all info you enter automatically.
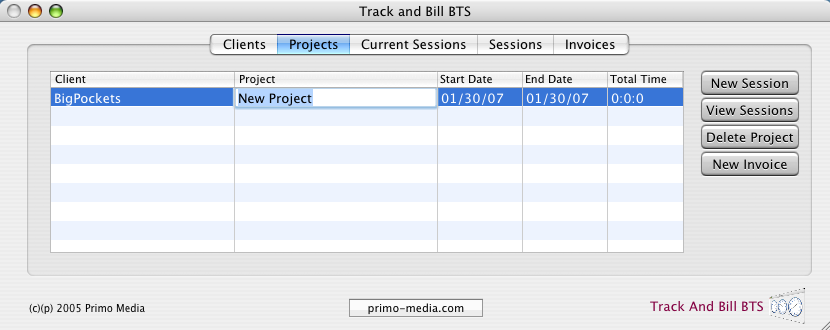
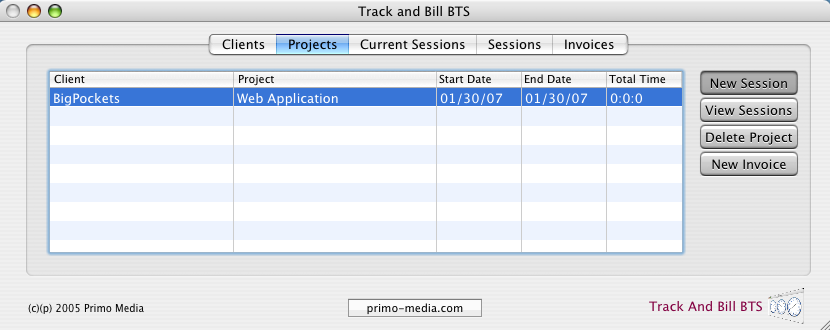
Projects:
To create a new Project, click the “Clients” tab, and select a Client. With the desired client highlighted, click the “New Project” button on the right of the client display list
The new project entry is created in the Projects tab, and you are ready to enter a project name.
Sessions:
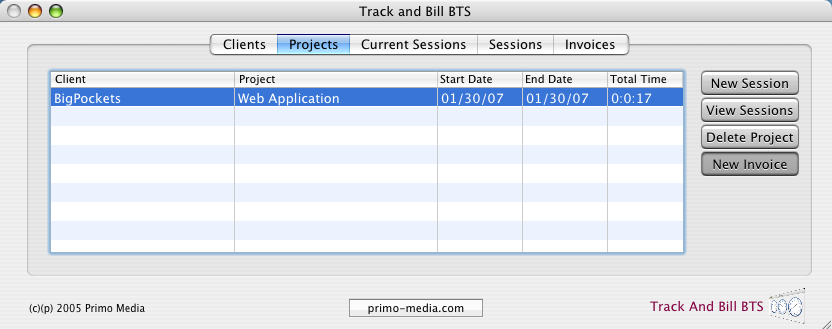
Projects are a collection of completed Sessions. Each Session has a date, start time, end time, and session notes. To create a new Session, select a Project from the “Projects” tab display list, and click the “New Session” button on the right side of the display.
The new Session will be created in the “Current Sessions” tab, and you will be ready to start your session. Set the Session “Start” time by selecting the “Set” button in the Clock column of the sessions display list.

Complete the session by clicking the “Set” button again. This will enter an End time for the Session. All Session info is auto-saved, and you may edit the start and/or end times, or clear the Session if you like. You may also Delete the Session if you’d like to permanently remove it from your Project.
NOTE: When you modify the time fields(or cells) you must be sure to enter the time in the format HH:MM:SS (hours:minutes:seconds). If you enter this in the incorrect format, the data storage structure may become corrupted.
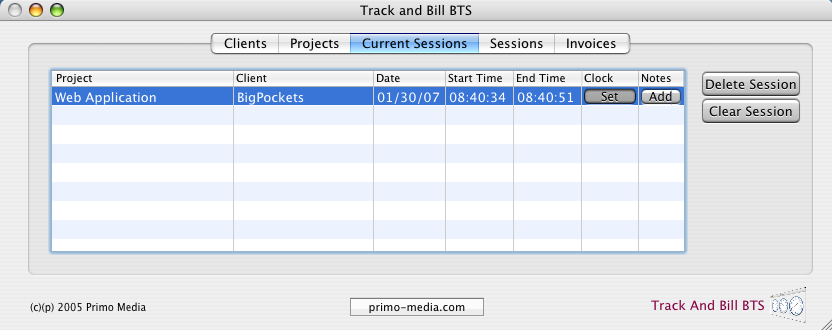
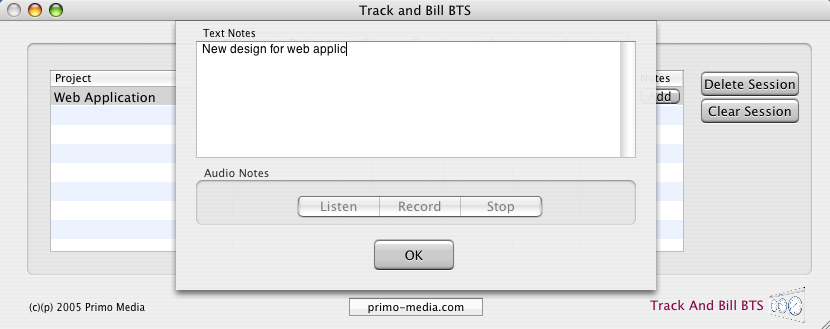
To add notes to the selected Session, click the “Add” button in the Notes column. Notes may be updated at any time. Audio notes are not available at this time.
To view all your completed sessions, click on the “Sessions” Tab. To view sessions by project, highlight a project in the “Projects” tab list, and click “View Sessions”.
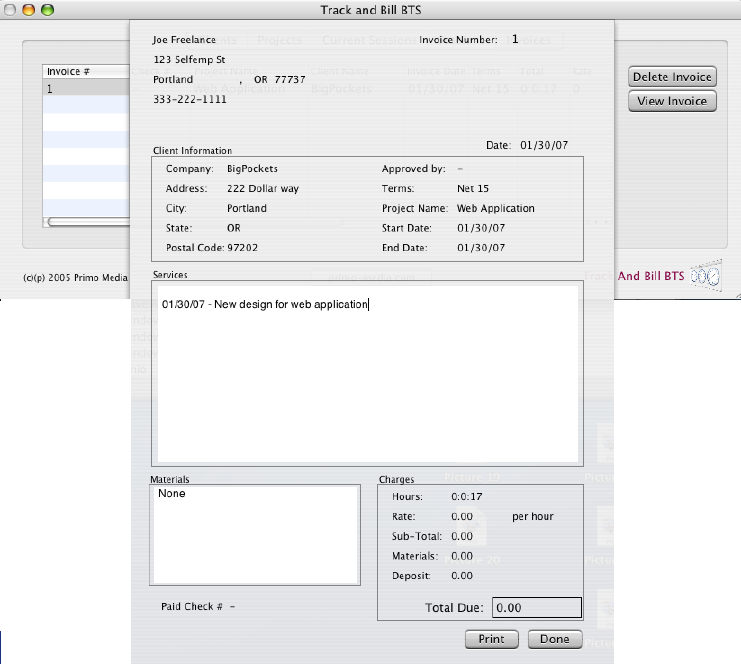
Invoices:
Invoices are created automatically from completed Projects. When your are finished with a Project, click the “Projects” tab, hightlight the desired project to invoice, and click the “New Invoice” button.
This will display a new invoice for the selected project under the Invoices tab, with a new invoice number. The invoice number is automatically incremented by one, based on your last invoice. Make any adjustments to the invoice using the columns/rows here, in the “Invoices” tab list display.
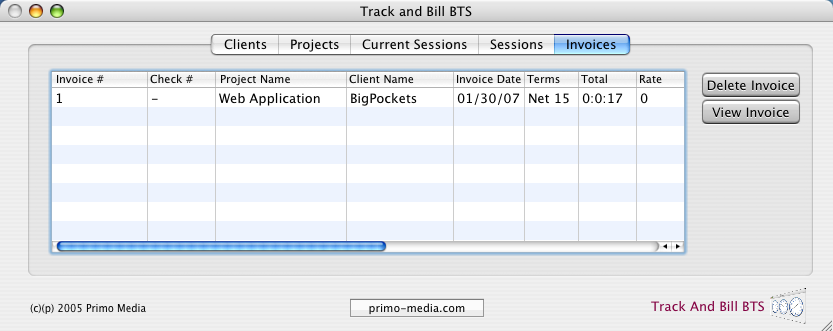
To display an invoice as a sheet, highlight an invoice in the invoices list, and click “View Invoice”. Your Session notes for the Project are automatically entered in the “Services” text box.You may edit the “Services” info and select Done, or Print to view printing and Fax options.